Embrace Autumn’s Charm and Make a Pumpkin Patch Quilt
Wrap yourself in the cozy embrace of autumn and make our beautiful Pumpkin Patch Quilt. It’s time for crisp mornings, warm afternoons, and a Pumpkin Patch Quilt – that features charm packs!
Perfect for a Fall Quilt Pattern
The beautiful & easy Pumpkin Patch Quilt Pattern captures the wonderful feeling of fall leaves and walking through a pumpkin patch to pick out a pumpkin. This is a great quilt pattern that you can make as a wall hanging, or make the small throw or large throw to snuggle beneath, or a beautiful bed quilt, 4 sizes are included.
Enjoy this quilt now and right on throughout the fall season to Thanksgiving. It’s fast & fun to make, and perfect to feature charm pack squares.
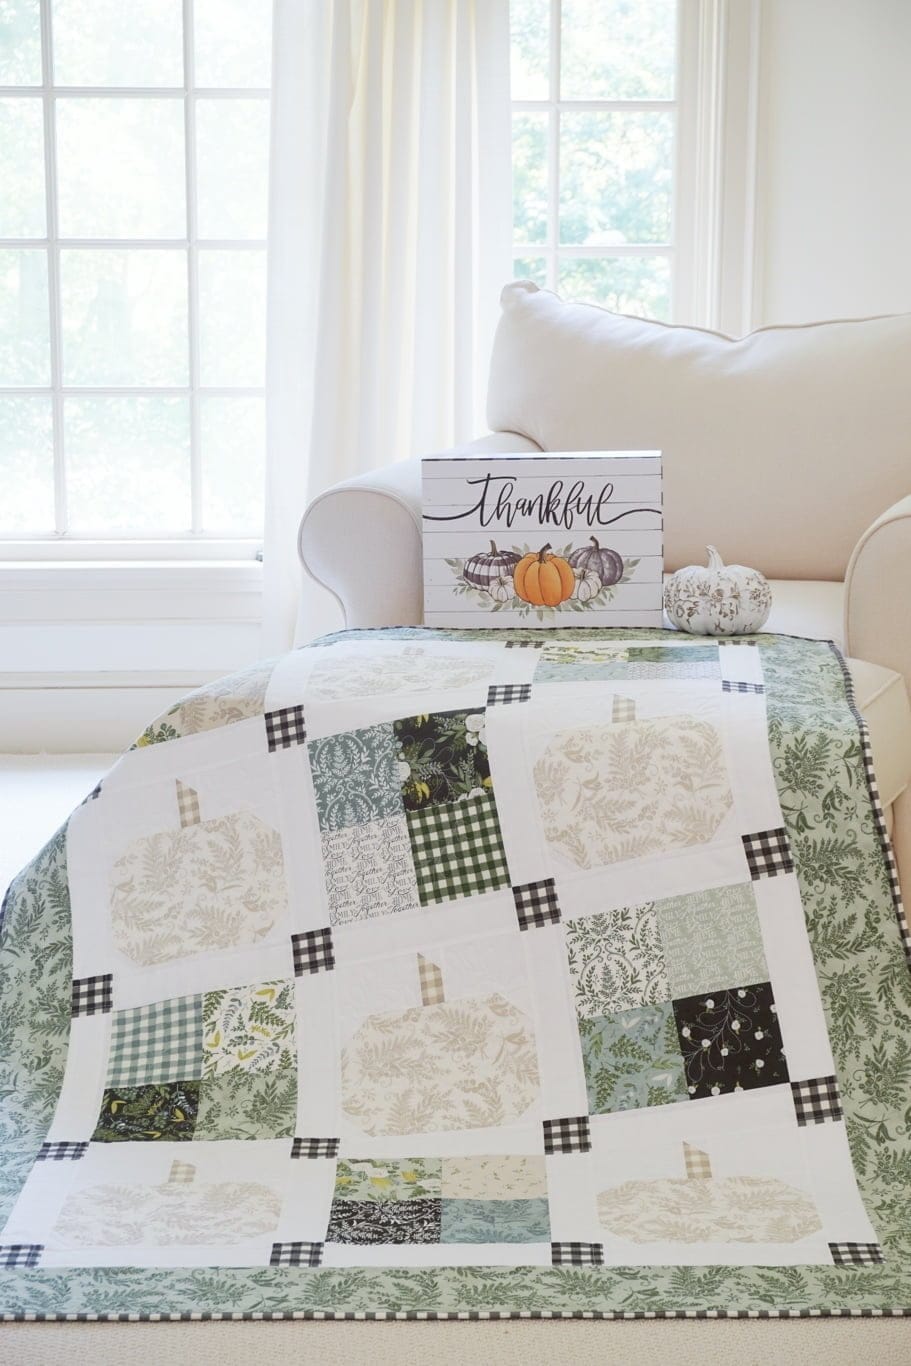
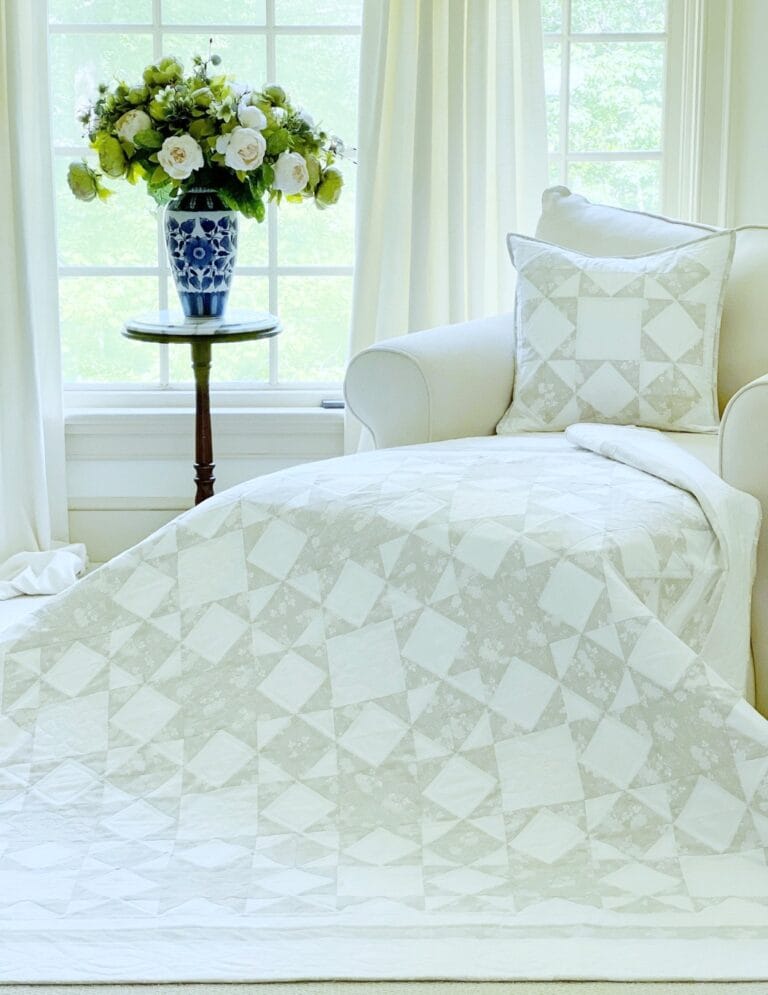
A White Pumpkin Patch
White pumpkins are so peaceful! I chose to feature white pumpkins in my quilt and used the beautiful Happiness Blooms fabrics by Deb Strain. I love how the off-white pumpkins turned out with the florals and leafy greens, and of course some black & white gingham check doesn’t hurt. Also, the hand-written words just give it a little touch of sweetness.
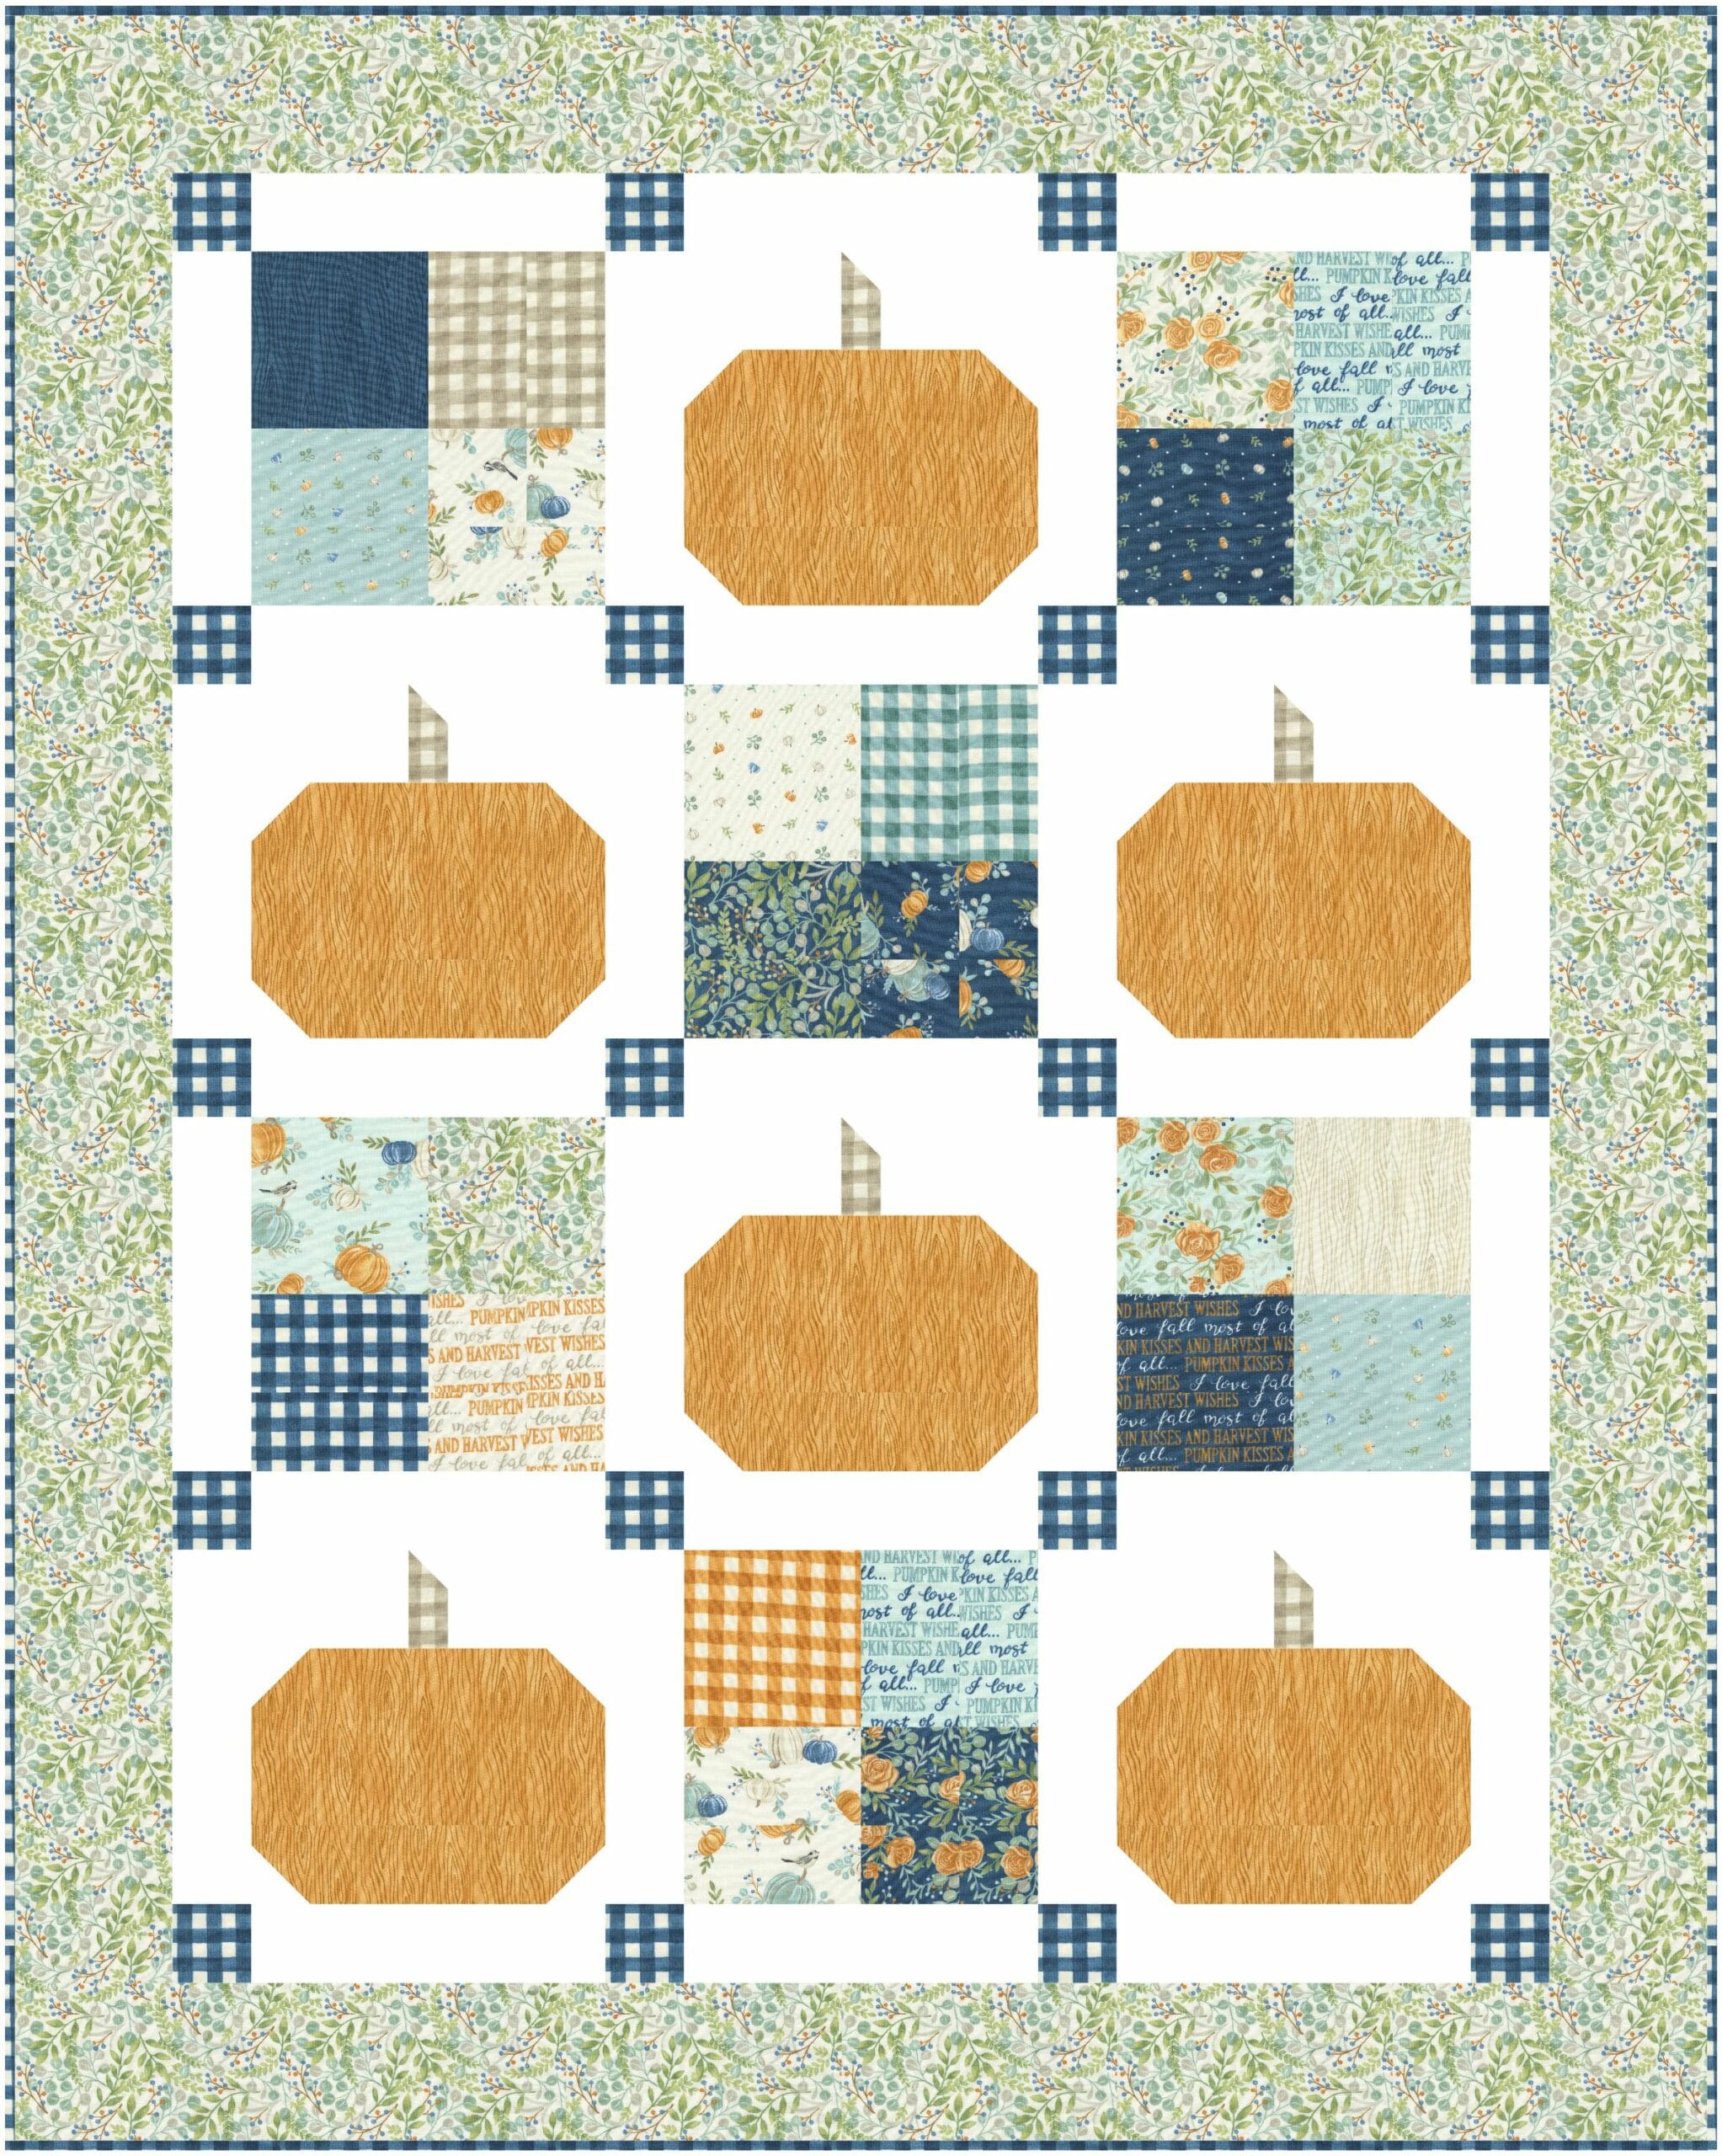
But this quilt would also be equally gorgeous to feature orange pumpkins. I’ve done a mock up for you in the Harvest Wishes fabric collection which is also by Deb Strain and here it’s shown in the small throw size.
How I Quilted the Pumpkin Patch Quilt
Because it’s a fall quilt, I wanted to quilt some feathered wreaths on it. I know we all get a little timid doing feathers when free-motion quilting but these 2 stencils really make it sooooooo easy. I used this 7 1/2″ Feather Wreath Stencil for the 4 patch blocks and this 5 1/2″ Feather Wreath Stencil for the pumpkin blocks. They’re both continuous line stencils which are designed for free-motion quilting.
All you need to do is trace the design with a disappearing / erasable fabric pen and then follow the lines.
Quilting Tip: First, find and mark the center of the wreath on the stencil, and then line it up with the center of your block. It makes it a lot easier centering everything, and then trace the design. 😉
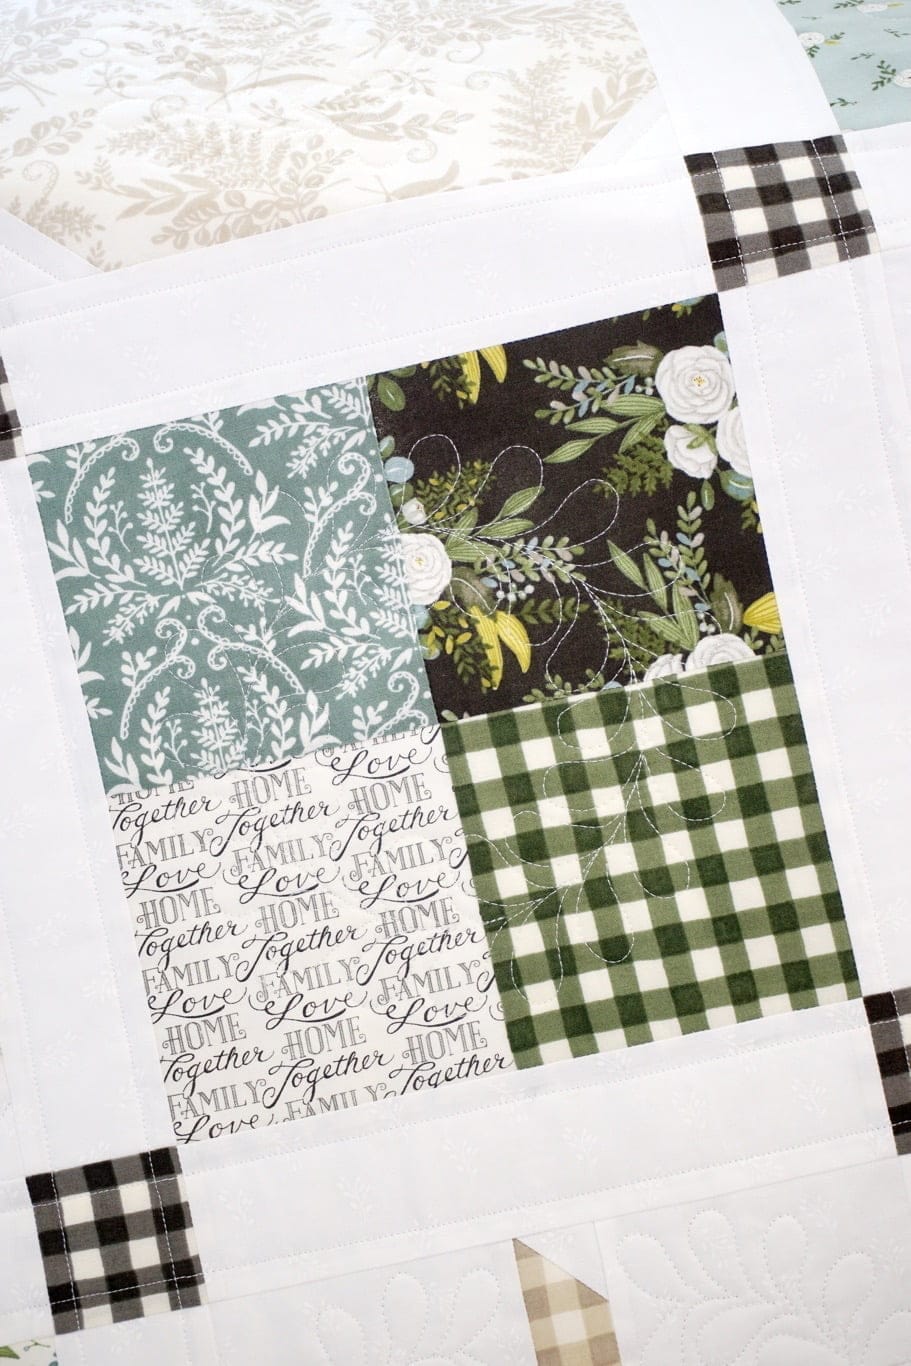
Place your hands to guide your fabric and start from anywhere along the centerline of the wreath, go out following a leaf (to the outside or to the inside of the wreath) and then back to the centerline, stop, move your hands if you need to and then go out to the opposite side to get the next leaf. Repeat.
You will notice there are a couple of spots where there’s an extra “outside” leaf to help fill in for the curve. So you may need to do two outside leaves before the next inside leaf.
I then added some straight-line quilting along the sashing to give it a feeling of garden rows. This combination of designs worked really well together and made it quick to finish.
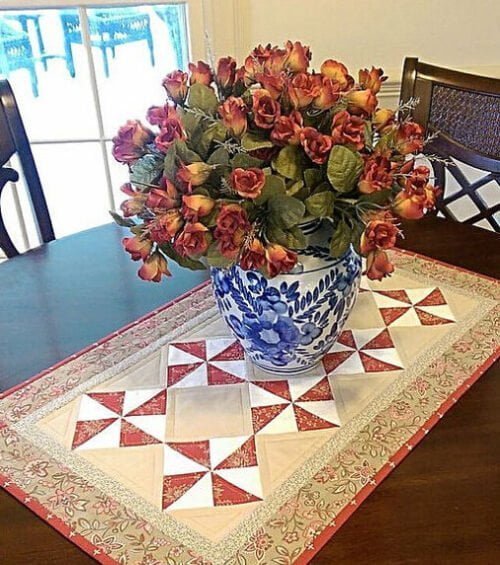
You might also like our Cottage Star Table Runner Pattern that’s perfect for fall too.
Quilt Pattern Details
- HIGH-QUALITY & EASY to Follow Step-by-Step Instructions including color diagrams and helpful quilting tips.
- FINISHED QUILT MEASUREMENTS – (All Sizes Included)
- Wall Hanging – 43″ x 43″
- Small Throw – 43″ x 54″
- Large Throw – 65″ x 65″
- Queen – 87″ x 87″
- QUILTING LEVEL – EASY – Beginner.
To see more pictures or to purchase the Pumpkin Patch Quilt Pattern, simply click on a link.
(Physical copies available in the MCD shop.)
I tried to purchase “You Can Machine Quilt” to go with my purchase of the fall pumpkin quilt. And I also purchased the
the feather stencils. You are out of this? When is it in stock again?
Thank you for asking. The “You Can Machine Quilt” is currently undergoing revision to include more information.